Searching for a way to take your client’s wedding hair to the next level? Two words: hair extensions. Perfect for adding length and enhancing volume, a good set of clip-ins could be just the tool you need to achieve all those stunning princess-worthy updos, dreamy twists, and perfect braids that your clients envision wearing on their big day.
To give you some inspo on how to style bridal hair with hair extensions, fan-favorite extension brand Luxy Hair shared with us three beautiful hairstyles that can be created using their Luxy Hair 20” Seamless Clip-In Extensions ($219.00 – $269.00). To get started, be sure to prep the hair by clipping in your extensions for added fullness, before curling the hair with a curling wand like Luxy’s Signature Curler ($105.00) to achieve soft, loose waves.
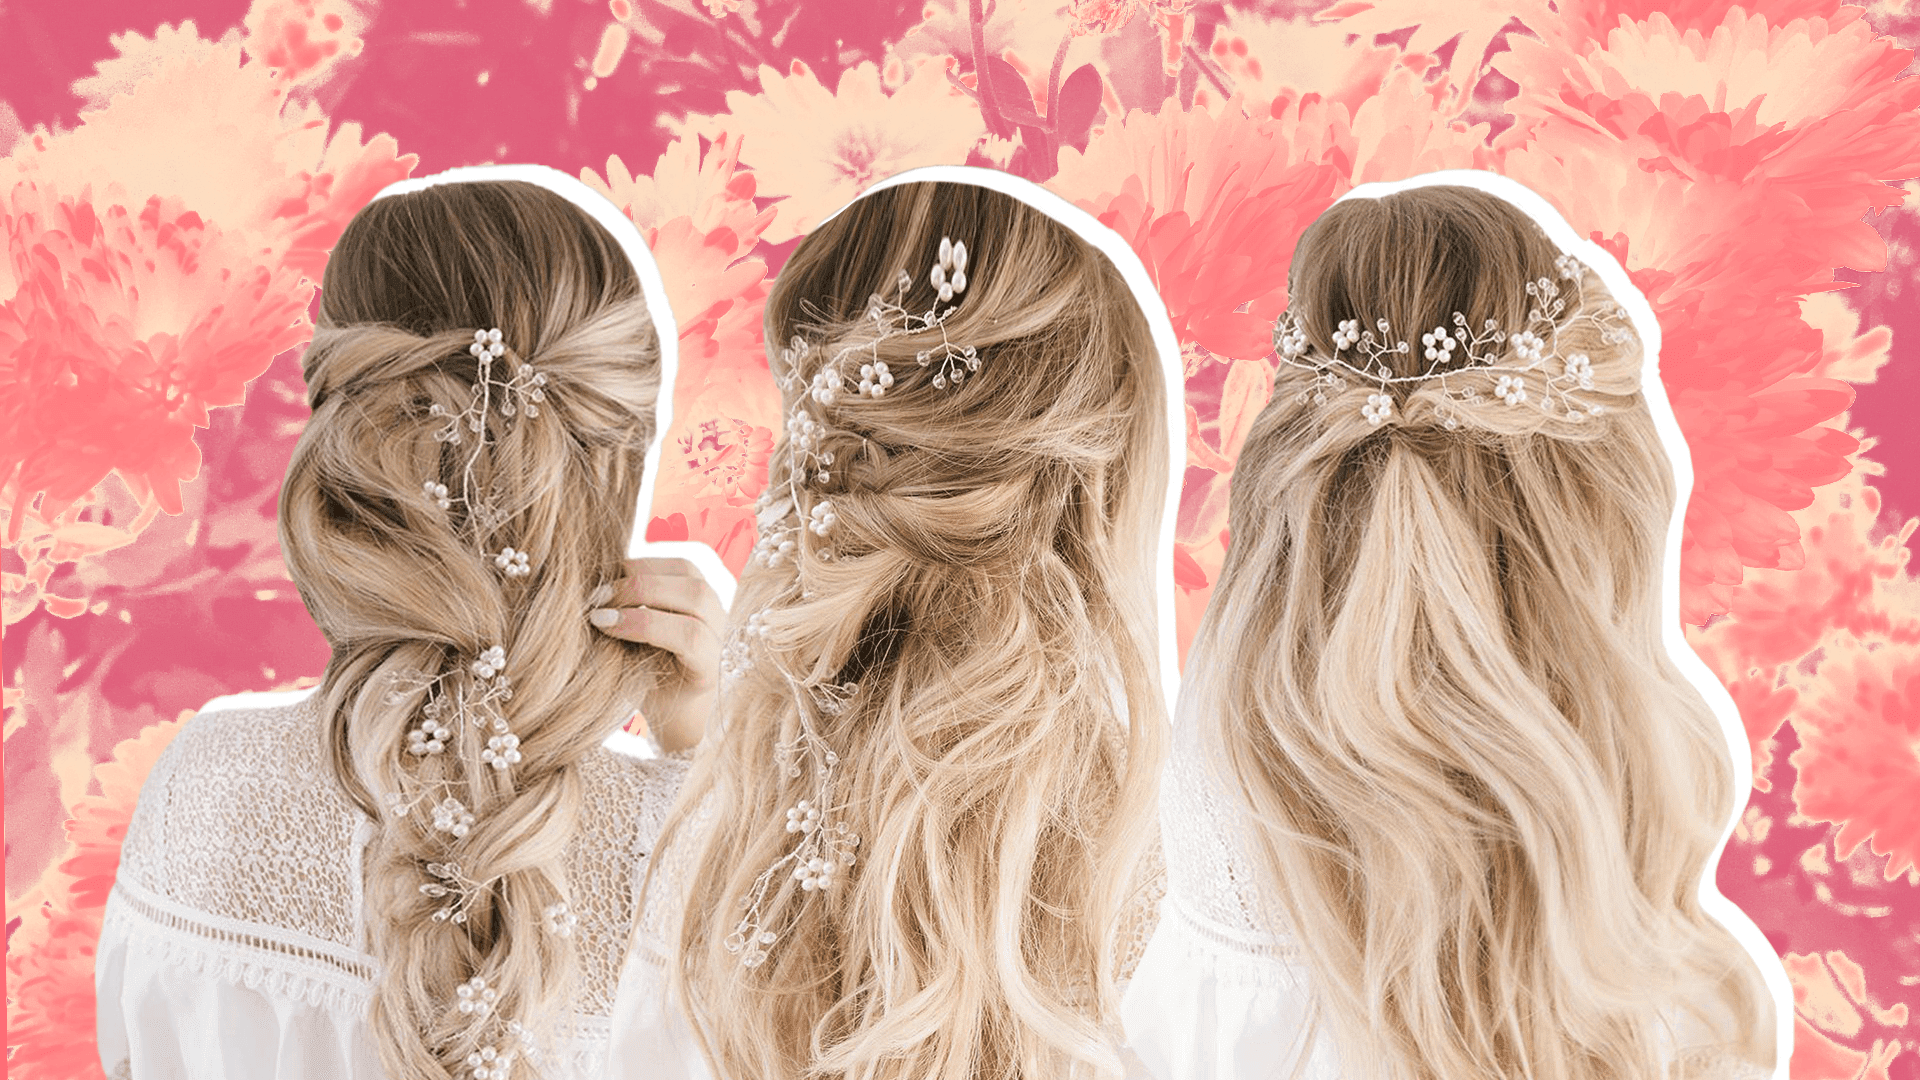
Keep scrolling for three super romantic hairstyles using clip-in hair extensions.
Look 1: Twisted Braid With Headpiece
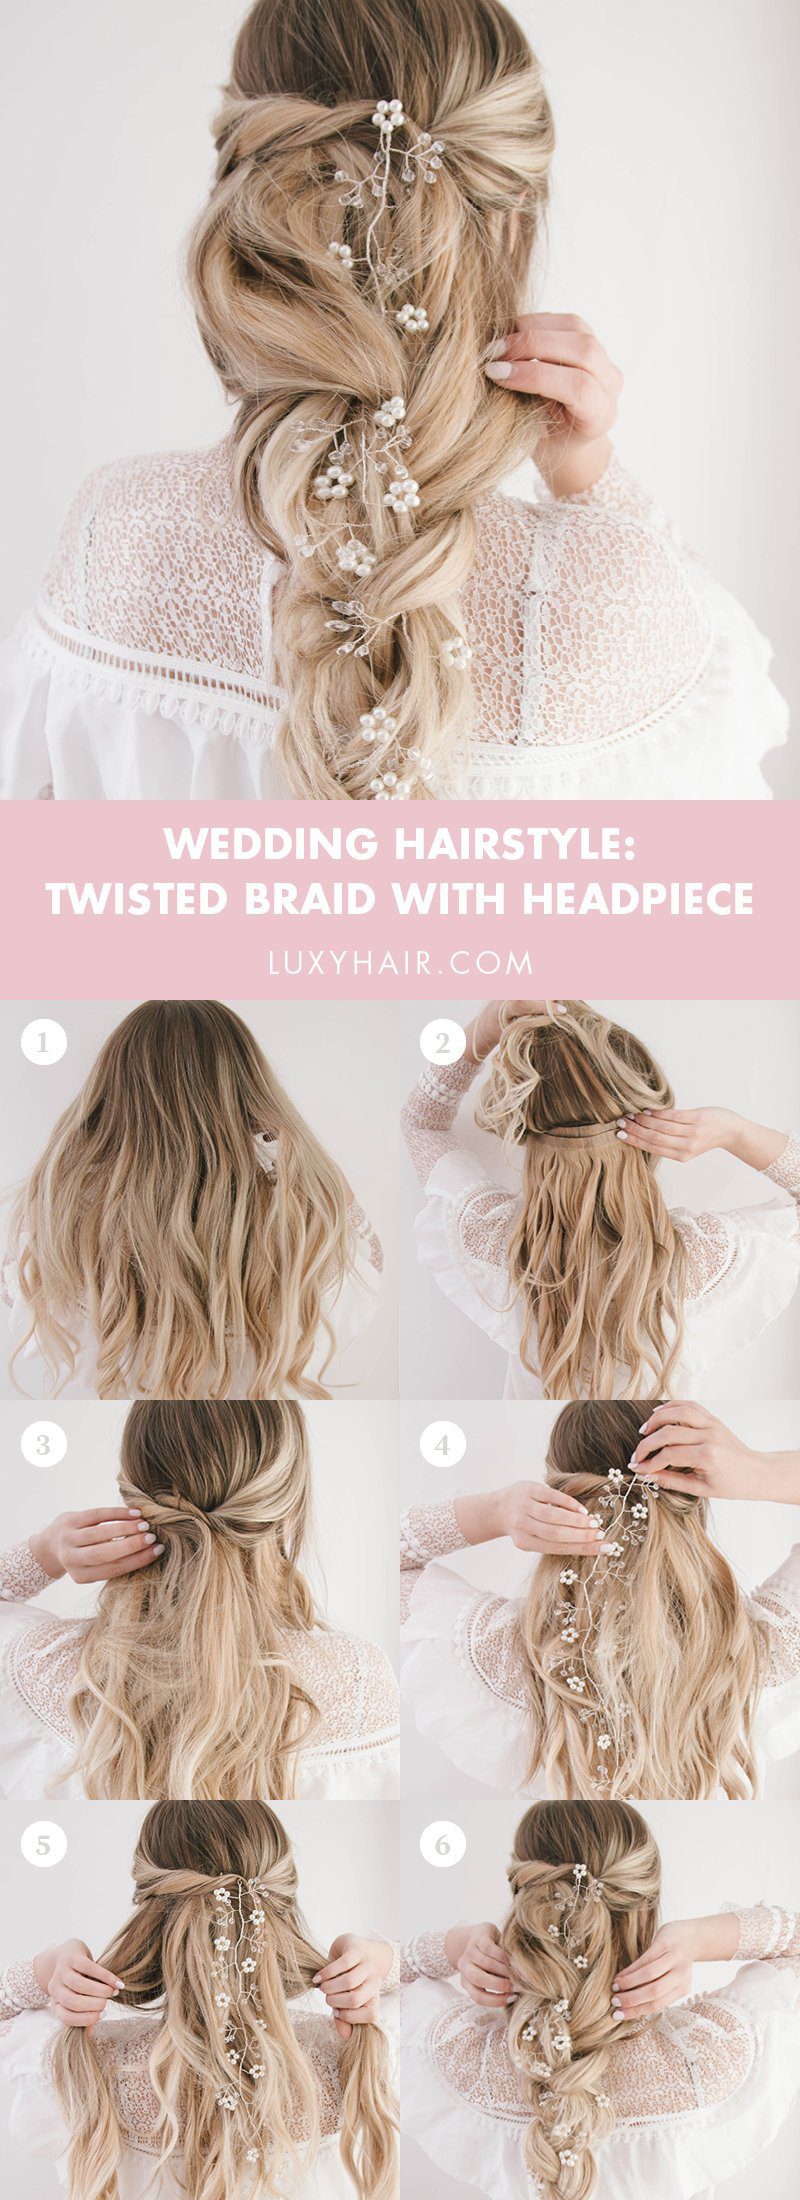
- Gather a thick section of hair right above each ear, and twist each section toward the back of the head.
- Secure each twist with some bobby pins.
- Clip your bridal headpiece in at the center, where the two twists meet.
- Gather all the rest of the loose hair and divide it into 3 equal sections. Then, begin to braid the hair into a romantic, loose 3-strand braid.
- Pin back any unwanted flyaways and generously spritz the hair with hairspray to hold the style in place.
The Final Look:

Look 2: Half Up Layered Twists
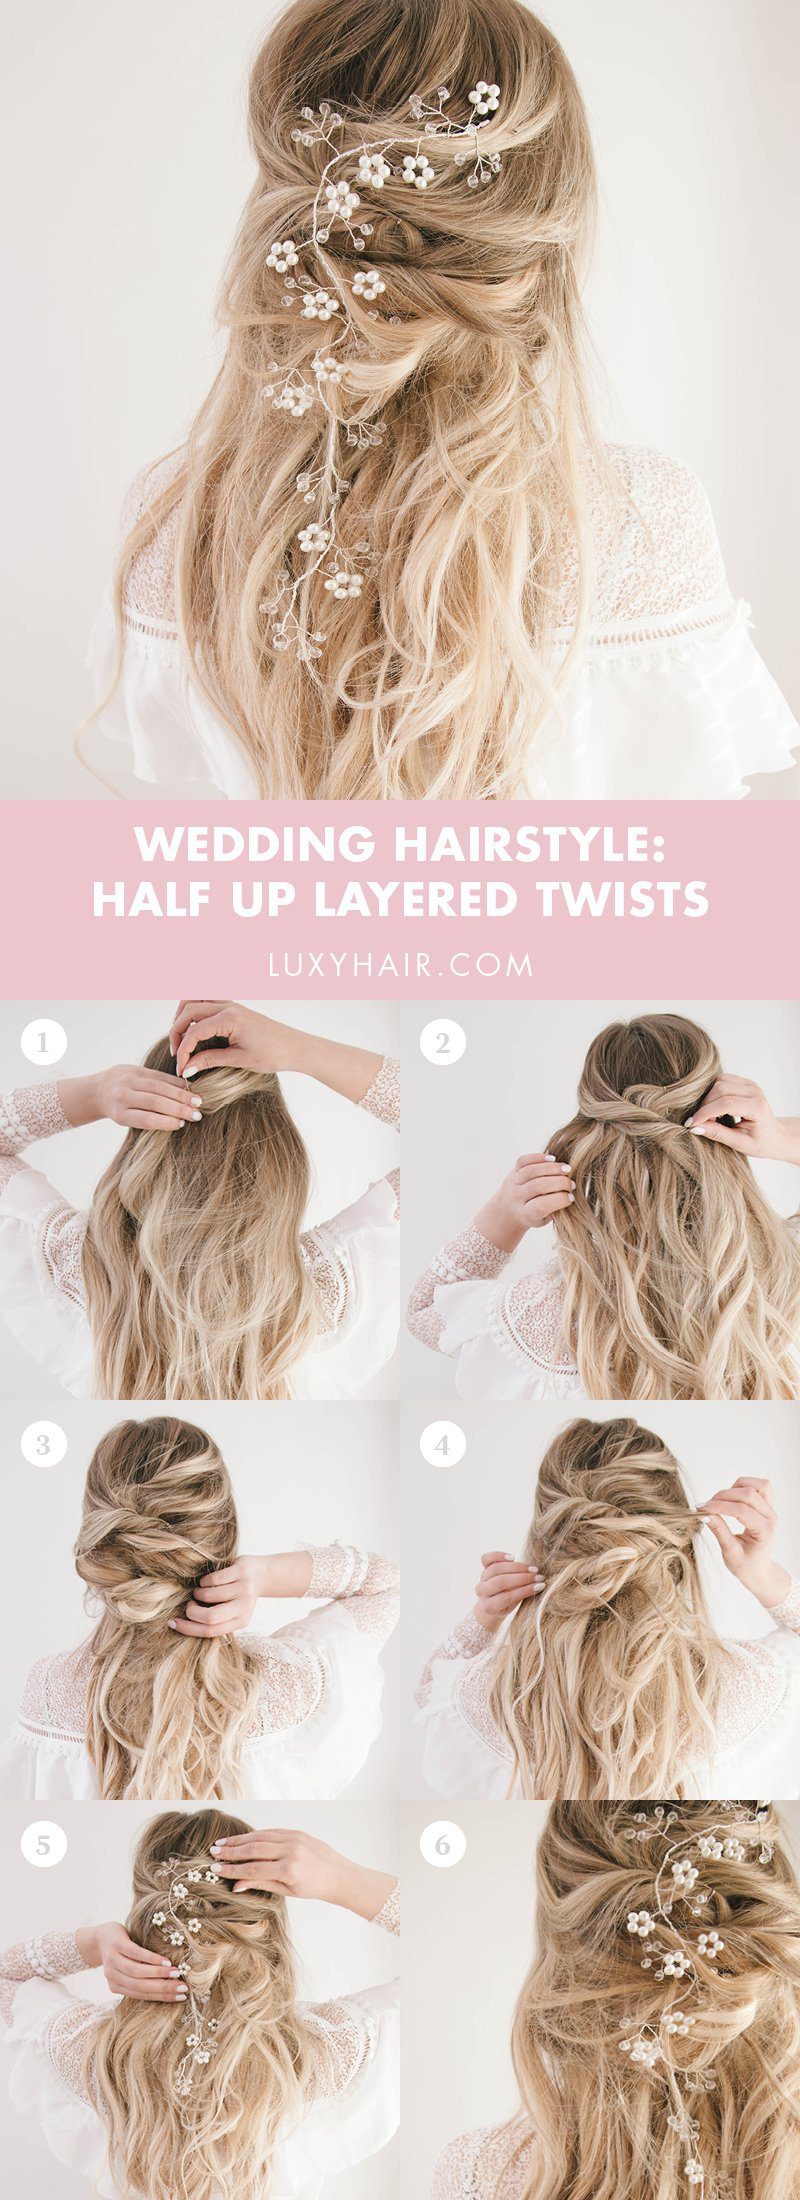
- Start with the hair down in loose waves. Then, take a 1 inch section of hair from the right side of the head, cross it over to the back and pin it down, making sure to smoothen any flyaways.
- Take a 1 inch section of hair from the left side of the head and cross it over to the right side of the hair. This time, twist the hair and pin it over top of the first section.
- Grab another section of hair from the right side, this time much thicker than the first strand (about 3 inches thick). Begin to cross it over to the left side of the head, twisting the hair as you go. Then, use as many bobby pins as needed to hold the piece in place.
- Repeat step 3 on the left side.
- At this pin, you can either leave the hairstyles as is, or you can add a few more twists on each side—it’s totally up to you!
- Tug gently on the twists to loosen up a few strands of hair for that undone, romantic feel.
- Attach a headpiece of your choice.
The Final Look:
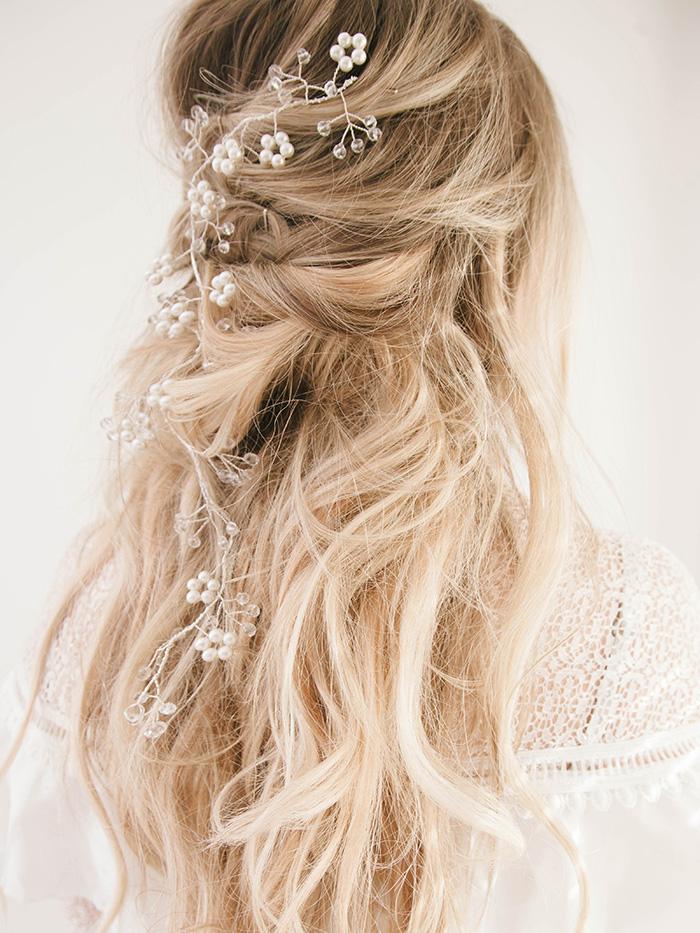
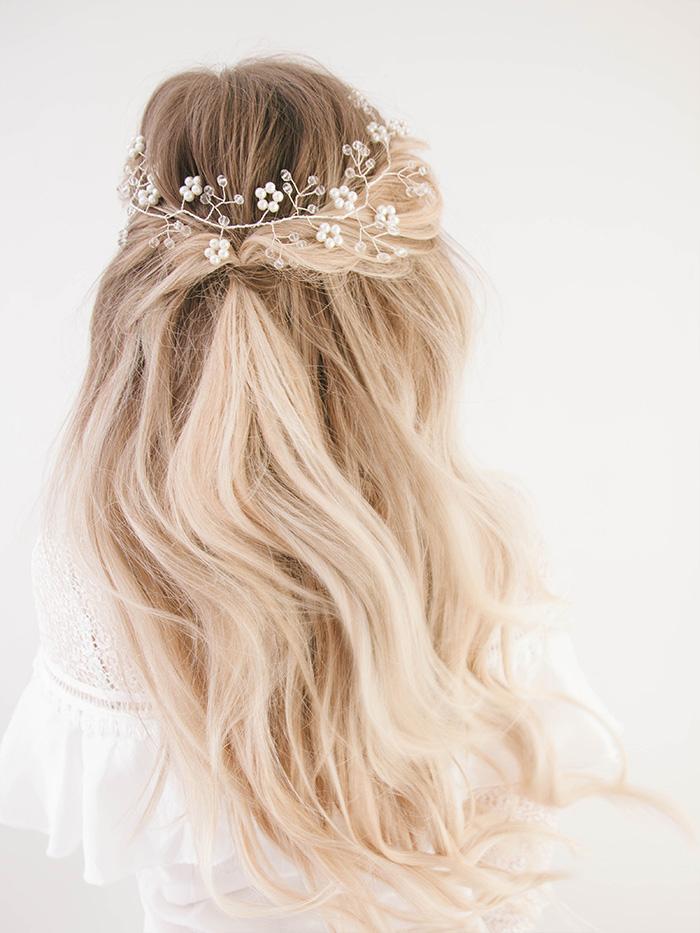
Look 3: Enchanting Half Up Twists

- Gather a 2 inch section of hair from the right side of the head and twist it towards the back. Do the same on the left side.
- Now, secure these twists together with a hair elastic at the base, close to your hairline to ensure that the twists don’t pull apart. Be sure to use a hair elastic that is close to your hair color.
- Hold the middle of your tied-together twists, and pinch at each twist, pulling it apart slightly for added fullness.
- Once you are satisfied with your twists, take a small section of loose hair and thread it through the middle of the twists to hide the elastic and secure it in place with a bobby pin.
- Attach a romantic floral headpiece or a veil.
The Final Look:
To learn more about Luxy Hair Extensions and see more of their hair styling ideas using extensions be sure to follow the brand @luxyhair on Instagram.